For us to provide a reverse lookup, our name servers need to have a delegation for the net-block (CDIR) in which that IP address resides. In most cases connectivity providers will not delegate blocks of their IP addresses to third party name servers, so you will need to contact your upstream connectivity provider to set up the reverse lookup.
Please note that if the connectivity provider is willing to delegate the net-block (CDIR) to easyDNS name servers, we would need to know the following:
- Size of the net-block (CDIR) the support range /32 (1 IP address) to /24 (256 IP’s).
- The method of delegation. It is important that you find this out otherwise it will not work. We also support the following methods:- RFC 2317
– RFC 2317 Modified
– IP Range
– First IP
- Delegation to our name servers need to be given propagation time. We also have no control over what connectivity providers do or any delays in delegating.
Obtaining Your Net BlockBefore setting up reverse DNS with us, you will need to inquire with your ISP that they are willing to delegate control over the net block they have assigned you to ZoneEdit. In addition, ask your ISP if they can provide you with a PTR record for your IP addresses, or, if not, if they will be able to delegate to ZoneEdit. Once you have this confirmed, you will need them to provide you with the net block itself.
CIDR NotationWe require that your net block be in what is called CIDR notation. This will be a numeric representation of the range with consists of the starting IP and then the class of block-sizes to determine the ending IP of the range.
For example, if your ISP has provided you with a range of 32 IP addresses that begin at 192.1.2.0, then this is called a /27 range, and the CIDR notation for it would be 192.168.2.0/27
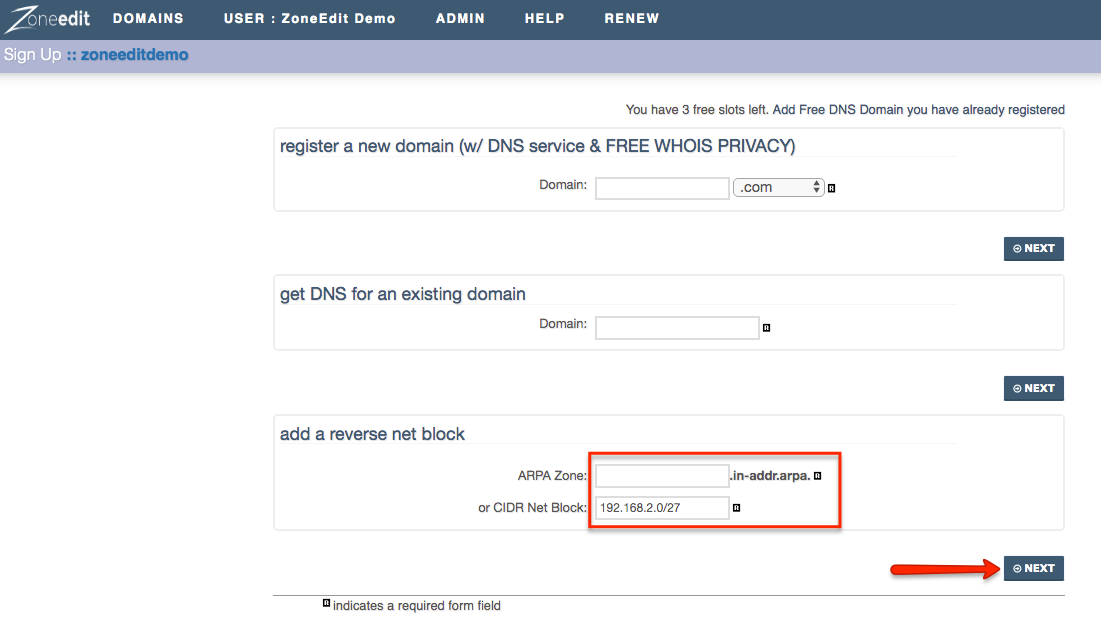
Adding Your Net BlockOnce you have your net block in hand, please do the following:
1. Log into your ZoneEdit account
2. Click on ADD A DOMAIN

3. Enter your CIDR NET BLOCK and click on NEXT
4. Select your service level, agree to the ZoneEdit Terms, and click on NEXT

5. Select your Reverse Delegation and click on NEXT

6. Click on CHECKOUT

7. Process your invoice
When the invoice has been paid, the zone will become active on our system. Once you configure it, your ISP can then delegate the block to us.
Delegation Methods (Info For Your ISP)When the reverse block is added, our system will automatically detect the current delegation method your ISP has selected, and advise you as to what you need them to do.
To access this information please do the following:
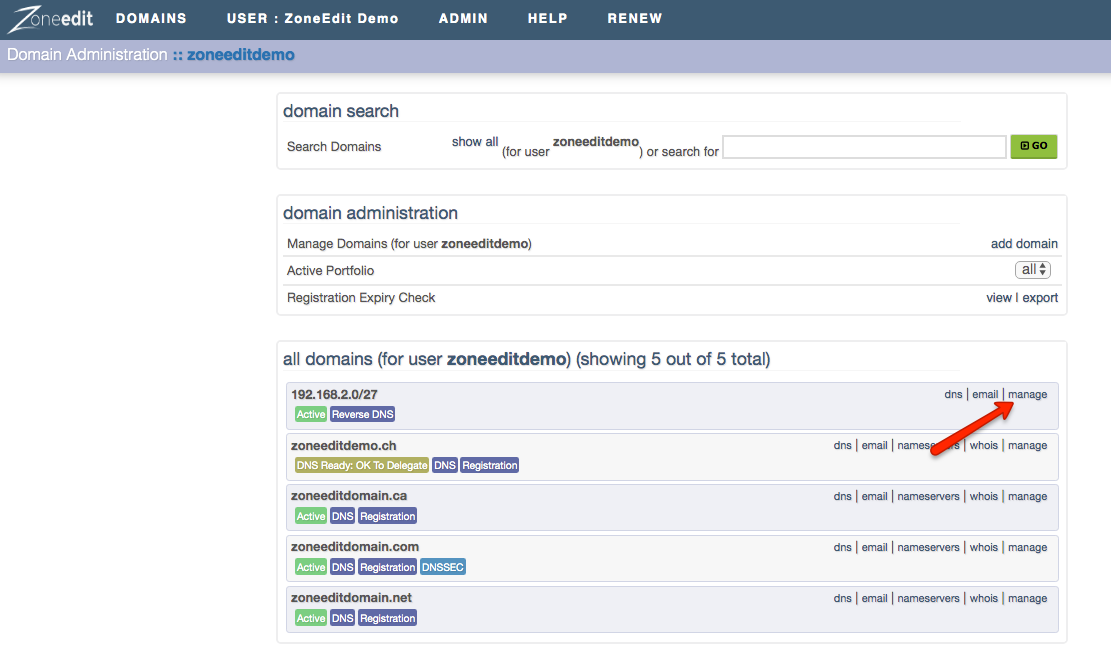
1. Click on the MANAGE link for your Reverse block
2. Under the DNS SETTINGS tab, click on GET INFO

3. Follow the instructions on screen

NOTE: If your ISP is at all uncertain about how to do this, please ask them to see the documentation
HERE.
NOTE: If your upstream provider has changed the way they have delegated your net block to you, you can update that information through the CHANGE link (beside the GET INFO link mentioned above).
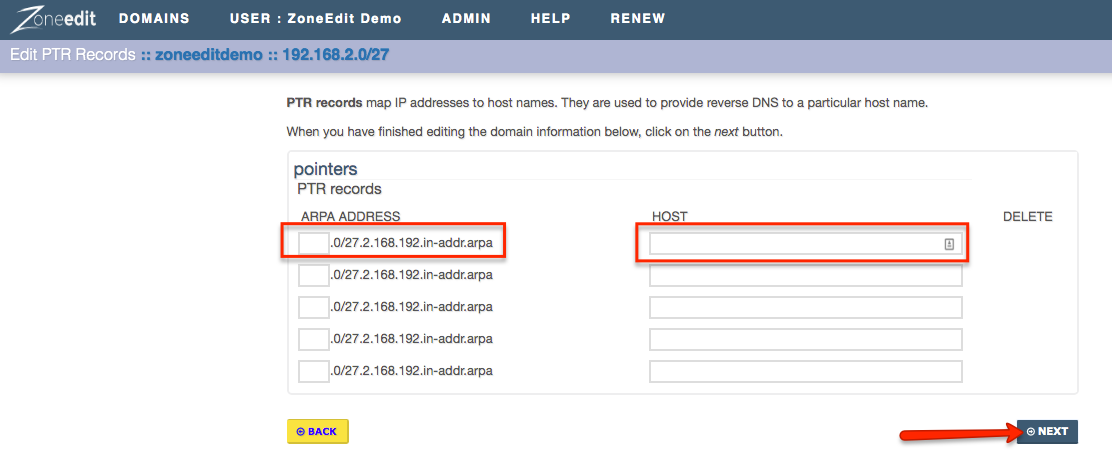
Setting Up Your PTR RecordsOnce the net block has been added and the invoice paid, you can configure PTR records by doing the following:
1. Click on the DNS link for your Reverse block

2. Click on the MODULAR EDITOR tab
3. Click on the wrench tool for PTR RECORDS

4. Under ARPA ADDRESS enter the final octet of the address you want the record for
5. Under HOST enter the host record you wish it to show as valid for that IP
6. Click NEXT
7. Confirm your changes
The only IPs that require PTR records are those which are the location of a sending mail server. In short, when you send mail outbound from a server, the receiving mail server may wish to check that this connecting mail server is coming from somewhere that has some sort of verification as to its identity. So it will do lookups first on the name of the host connecting to see what the DNS for that host resolves to, and then for the PTR record to confirm they match. Once it sees they match, it will allow the mail to pass.