Please note that this tutorial is on how to add your TheWEB.zone IP address to your DNS settings within your ZoneEdit account. If ZoneEdit is not the current DNS provider for your TheWEB.zone domain name, you will need to contact your current provider for further support.
To add your TheWEB.zone IP address within the domain's DNS settings, you will need to do the following:
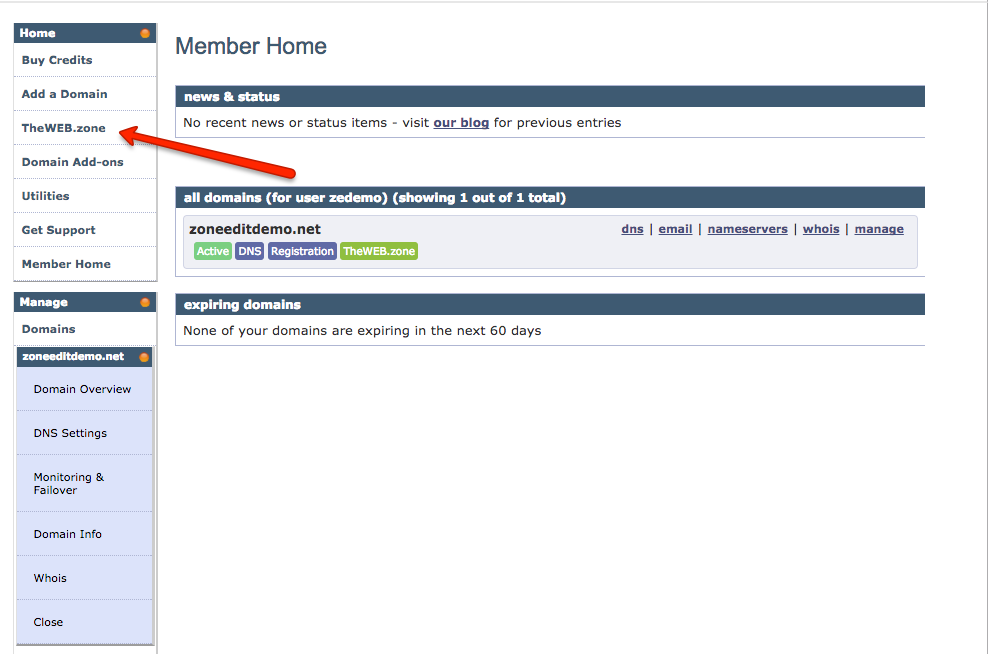
1. Log into your ZoneEdit account.
2. Get your TheWEB.zone IP address within the TheWEB.zone link located in the left sidebar menu.

3. Go to the DNS SETTINGS page for said domain.
4. Click on the green wrench tool for HOSTS A RECORDS.
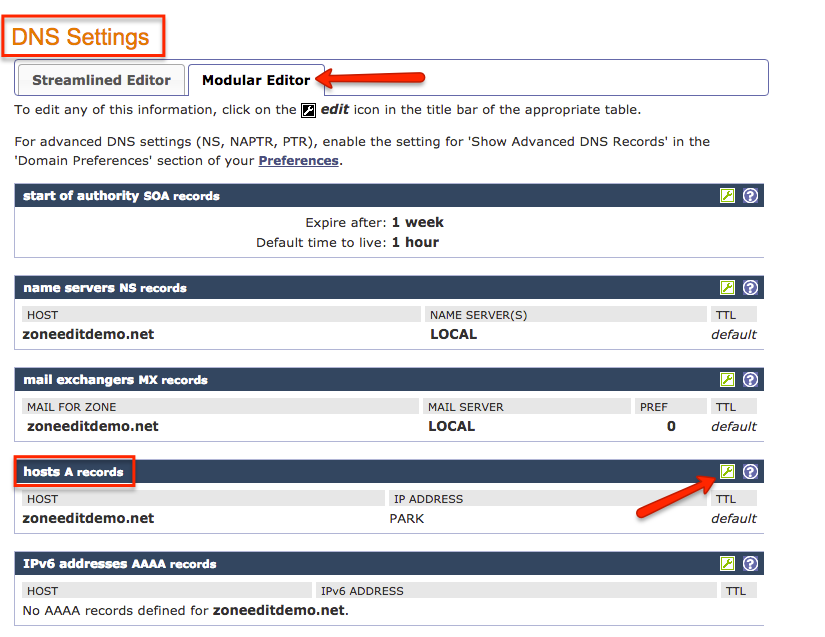
5. Enter '@' under HOST and your TheWEB.zone IP address under IP ADDRESS.
6. Click on NEXT.

7. Confirm your changes.
Please note that changes to the DNS settings for a domain name can take a few hours to take affect.