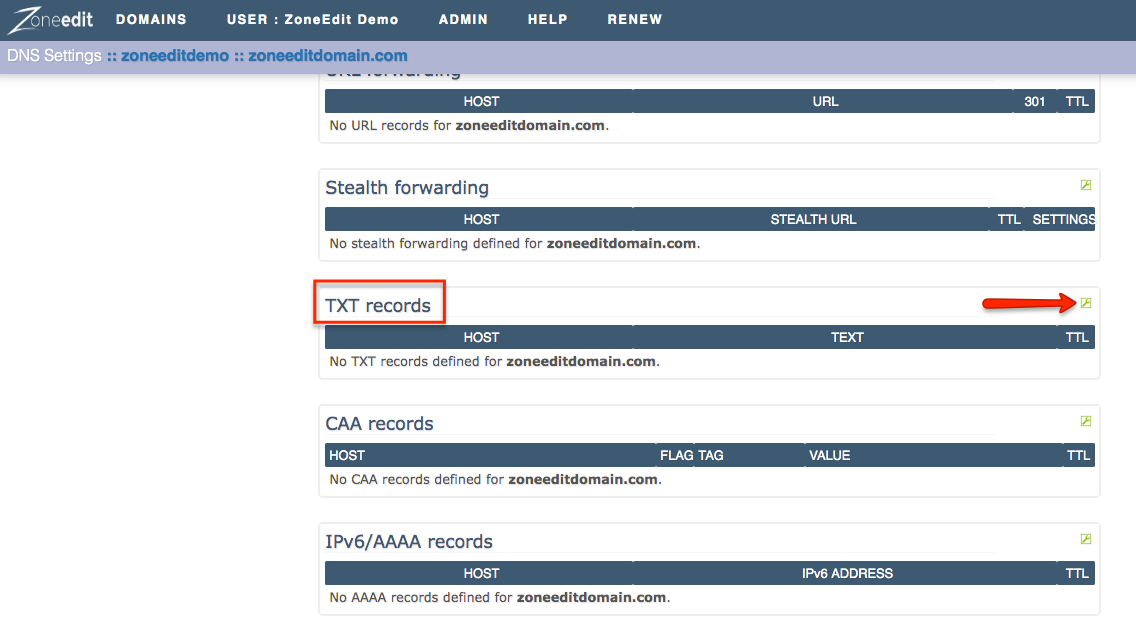
Users should note that SPF, TXT, and DKIM records all go into the same DNS Settings section.
SPF (Sender Policy Framework)SPF allows email systems to check on the sender of a message to be sure it comes from a legitimate source, and refuse email that does not. SPF is not directly about stopping spam/junk email. It is about giving domain owners a way to say which mail sources are legitimate for their domain and which ones aren’t. While not all spam is forged, virtually all forgeries are spam. SPF is not anti-spam in the same way that flour is not food: it is part of the solution.
One of the most common tricks used by spammers to send unwanted email is to disguise where the email is coming from. Often people receive bounce messages for an email, which appeared to come from their address, when in fact they did not send it. This is an effect of spammers trying to get around blocking by faking what address sent the email (called spoofing or forging the headers). With SPF preventing this, spammers cannot fake from where they are sending and they become that much easier to block. However users should note that in order for SPF to work, both the sending and receiving mail server must have this feature enabled.
SPF records are of interest to people who are concerned with cutting down the amount of spam circulating on the Internet. The more people who make use of SPF records to allow emails from their domain to be verified, the more reliably email systems can recognize whether an email is legitimate or not. While creating SPF records will not immediately affect the amount of spam you receive, over time this protocol can make bulk emailing more difficult for spammers.
SPF is also of interest to domain holders who are concerned that forged headers are making it look like they are spamming, as a way to demonstrate that the email did not actually originate from their domain.
Be aware that the RFC for SPF records allows only 10 DNS lookups for any given configuration, so if there are too many includes, SPF won’t work properly.
DKIM (Domain Keys Identified Mail)DKIM is a protocol for signing and verifying the authenticity of an email’s sender. It does not provide any encryption for e-mails themselves, nor does it provide any actual control over whether mail is received or not, unlike SPF. Mail is always received and accepted, regardless of whether it is correctly signed. The main value of it is for senders with large mailing lists who wish to avoid being throttled by large systems such as Yahoo, Hotmail or Google, all of whom support DKIM.
DKIM requires that sending mail servers be set up with a public/private key pair for signing outgoing messages, and a TXT record in the DNS zone file that displays the public key for authenticating signed messages.
You can likely find step-by-step instructions by Googling for: “your mail server” DKIM
Once you have generated the key pair, you will need to create two DNS records. One that alerts receiving mail servers that this domain supports DKIM and one with the actual key they must use for verification.
Here’s an example:
HOST TEXT
_domainkey t=y;o=~;
testkey._domainkey. k=rsa; p=MIGKAksdfjiMDOIUSHmisoishOIUSHEUSH…..
The first line specifies the domain as using DKIM, and advises as to what special settings are in place. The value t=y advises that the domain is still in testing mode. Once all is set up and working, you’ll want to remove that. The characters o=~ specifies that some of the mail from your domain is signed, but not all. You should specify o=- if all of the mail coming from your domain will be signed.
The second line names which key is being used (for those with multiple keys), in our case test key. The value in the ‘text’ field first advises what encryption method was used (k=rsa means the key was encrypted using the RSA encryption method) and then the public key itself.
Once the values have been confirmed, please take the opportunity to check them against the data you have generated or been provided by your mail service provider.
To enter SPF, DKIM, or TXT records please do the following:
1. Log into your ZoneEdit account
2. Click on the DNS link

3. Click on the wrench tool for TXT Records

4. Enter the HOST and the TEXT portion of your record

5. Confirm your changes


